
Deploying your app on Replit is easier than you might think.
Whether you've created a simple to-do list app or a complex web application, Replit offers straightforward options to get your project live and accessible to users.
In this guide, we'll walk you through the Replit app deployment process, exploring various publishing options and demonstrating how to launch your application step-by-step. New to Replit? Start with our Replit AI tutorial for beginners first.
Understanding Replit Deployment Options
Before diving into the deployment process, it's crucial to understand the different options Replit offers. Each option caters to specific use cases and requirements. For a breakdown of what each costs, see our Replit pricing guide.
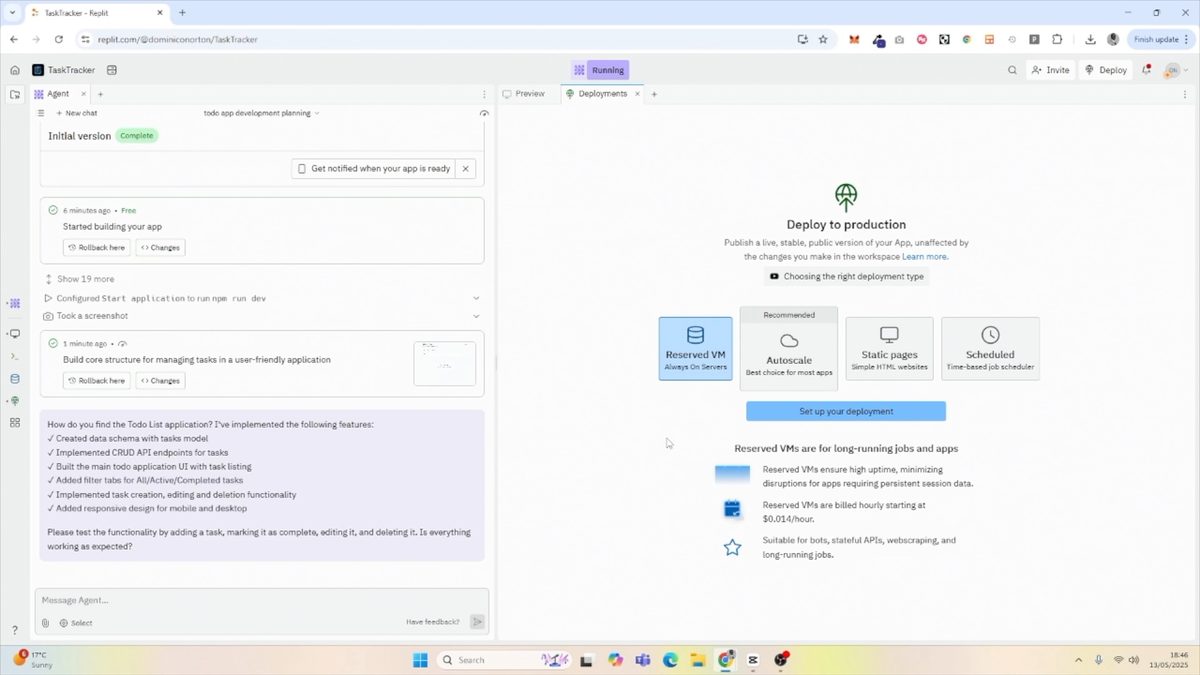
1. Reserve Virtual Machine
- Ideal for: Bots, stateful APIs, and web scraping
- Pricing: Fixed rate
- Always on, providing consistent availability
2. Static Pages
- Perfect for: Landing pages and websites
- Cost-effective: Pay only for outbound data transfer
- No database or data persistence required
3. Scheduled Deployment
- Best for: One-off tasks, cron jobs, and internal tools
- Runs at specific times
- Efficient for periodic tasks
4. Autoscale Deployment
- How it works: Resources allocated based on usage
- Cost-effective for varying user loads
- Automatically adjusts to traffic fluctuations
Step-by-Step Guide: How to Deploy on Replit
Now that we've covered the deployment options, let's walk through the process of deploying an app on Replit. We'll use a simple to-do list application as an example.
Step 1: Access the Deployments Tab
After creating your application in Replit, navigate to the deployments tab. You can easily find this by searching for \"deployments\" in the Replit interface.
Step 2: Choose the Appropriate Deployment Option
For our to-do list app, we'll select the autoscale deployment option. This choice ensures that our application can handle varying levels of user traffic efficiently.
Step 3: Configure Machine Settings
Replit provides recommended default settings for machine configuration. For most applications, including our to-do list, these default settings work well. You can always adjust these later if needed.
Step 4: Set Up Subdomains and Accessibility
Replit will generate a subdomain for your application. You can choose to keep this subdomain or customize it. Additionally, you can configure accessibility settings, such as making your application private or allowing access to specific endpoints.
Step 5: Initiate the Deployment Process
Once you've configured your settings, click the \"Deploy\" button to start the deployment process. Replit will handle the rest, setting up your application on their servers.
Exploring Replit Deployment Analytics and Settings
After deploying your application, Replit provides valuable tools to monitor and manage your deployment:
Accessing Deployment Analytics
- View domain information
- Monitor resource consumption
- Track user traffic and application performance
Managing Deployment Settings
- Change deployment type if needed
- Adjust resource allocation
- Shut down deployments when no longer needed
Replit Task Tracker App: A Practical Example
Let's take a closer look at our deployed to-do list application, which we've named Task Tracker:
Features
- Create new tasks
- Edit existing tasks
- Mark tasks as complete
- Delete tasks
This simple yet functional application demonstrates how easy it is to deploy a useful tool on Replit. Users can access the Task Tracker from any device with an internet connection, making it a versatile solution for personal or team task management.
Benefits of Using Replit for App Deployment
- Simplified deployment process
- Flexible options to suit different application needs
- Cost-effective scaling with autoscale deployment
- Easy-to-use analytics for monitoring performance
- Quick setup and configuration
Replit's app deployment system offers a user-friendly approach to getting your applications online. Whether you're a beginner or an experienced developer, Replit provides the tools and flexibility needed to launch your projects efficiently.
Want to learn more about Replit? Learn how to integrate AI API's here.
Ready to take your skills to the next level? Sign up for No Code MBA to access dozens of in-depth, high-quality courses on no-code and AI taught by industry experts. Join No Code MBA today and start building amazing applications without writing a single line of code!
Related Replit Tutorials
Frequently Asked Questions
What types of applications can I deploy on Replit?
Replit supports a wide range of applications, from simple static websites to complex web applications, APIs, and even bots. The platform's flexible deployment options cater to various project types and requirements.
How does Replit's autoscale deployment work?
Autoscale deployment automatically adjusts the resources allocated to your application based on usage. As traffic increases, more resources are dedicated to your app, ensuring smooth performance. When traffic decreases, resources are scaled down, helping to optimize costs.
Can I change my deployment type after launching my app?
Yes, Replit allows you to change your deployment type after launching your application. You can adjust this in the deployment settings if you find that a different option better suits your needs.
How do I monitor my app's performance on Replit?
Replit provides analytics tools that allow you to monitor your app's performance, resource consumption, and user traffic. You can access these analytics through the deployment dashboard.
Is it possible to use a custom domain for my Replit-deployed app?
While Replit provides a subdomain by default, you can typically set up a custom domain for your application. Check Replit's documentation or support resources for specific instructions on configuring a custom domain.
Advertiser disclosure: some links on this website are affiliate links, meaning No Code MBA may make a commission if you click through and purchase.