Create a no-code GPT3 writer app with Bubble and OpenAI 🤖✍️
Heads up - if you’ve never used Bubble before, you may want to learn the basics before attempting this project. But you’ll still leave with a great understanding of how the OpenAI API interacts with other apps. Okay, let’s go!
To learn more about building apps with AI, check out our full course here.
1. Create an OpenAI account
Create an API Key on your OpenAI account.
OpenAI is the company that built GPT-3 (the text generation AI) and provides us with an API to work with. 🤝 The API is how you connect OpenAI to your Bubble application to use AI technology in your app.
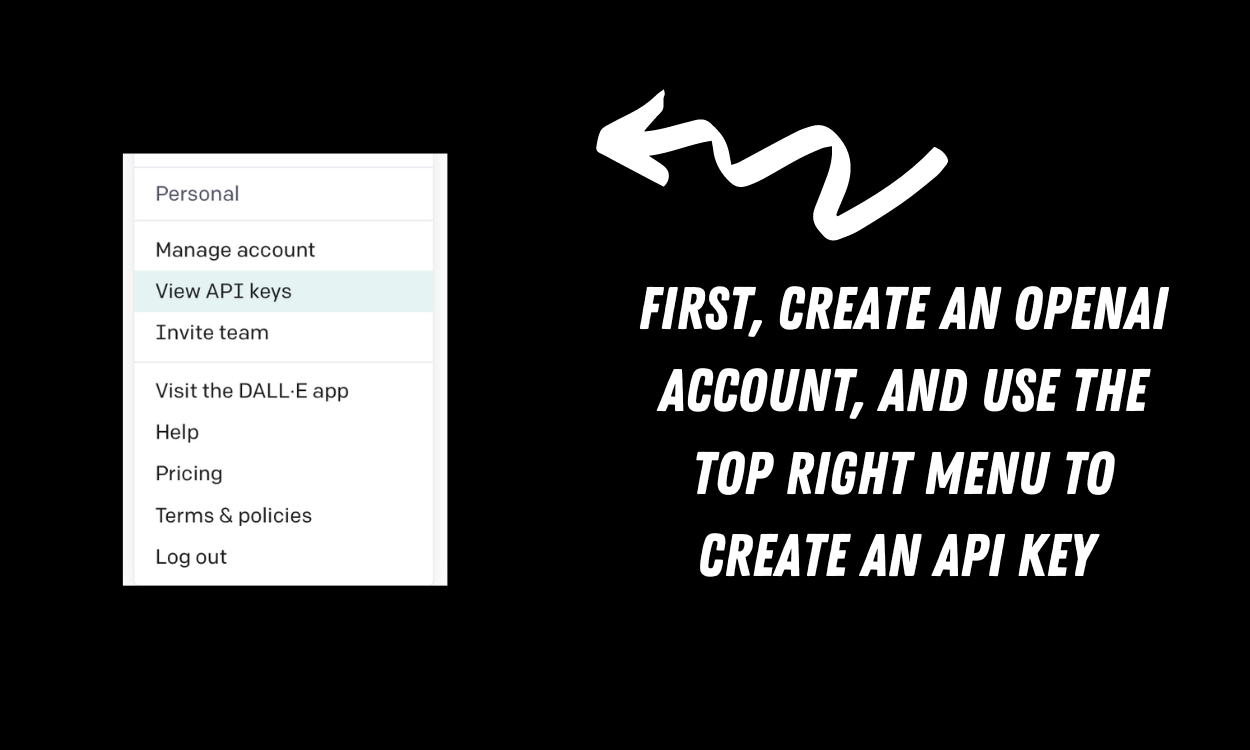
2. Create an API Key
Once you create your API key, copy it and then head over to Bubble.
(Don’t share your API Key! Think of it like a password to control your OpenAI account). 🔑 In Bubble, add the “API Connector” Plugin, which is what we'll use to connect to OpenAI.
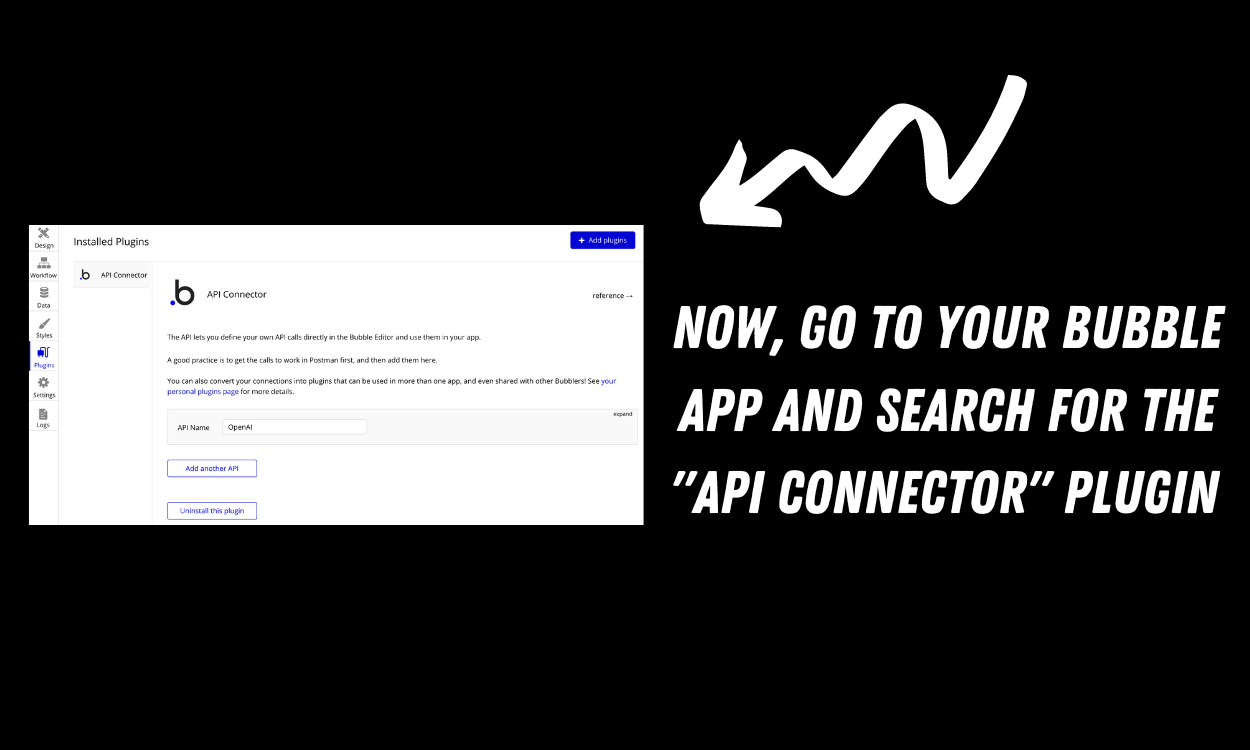
3. Set up your Bubble API connector
Set up the OpenAI connection in your Bubble app exactly like the image below.
When entering your key values, make sure your type Bearer, then a space, then your key. You can use the same API key for both key value spots 💯

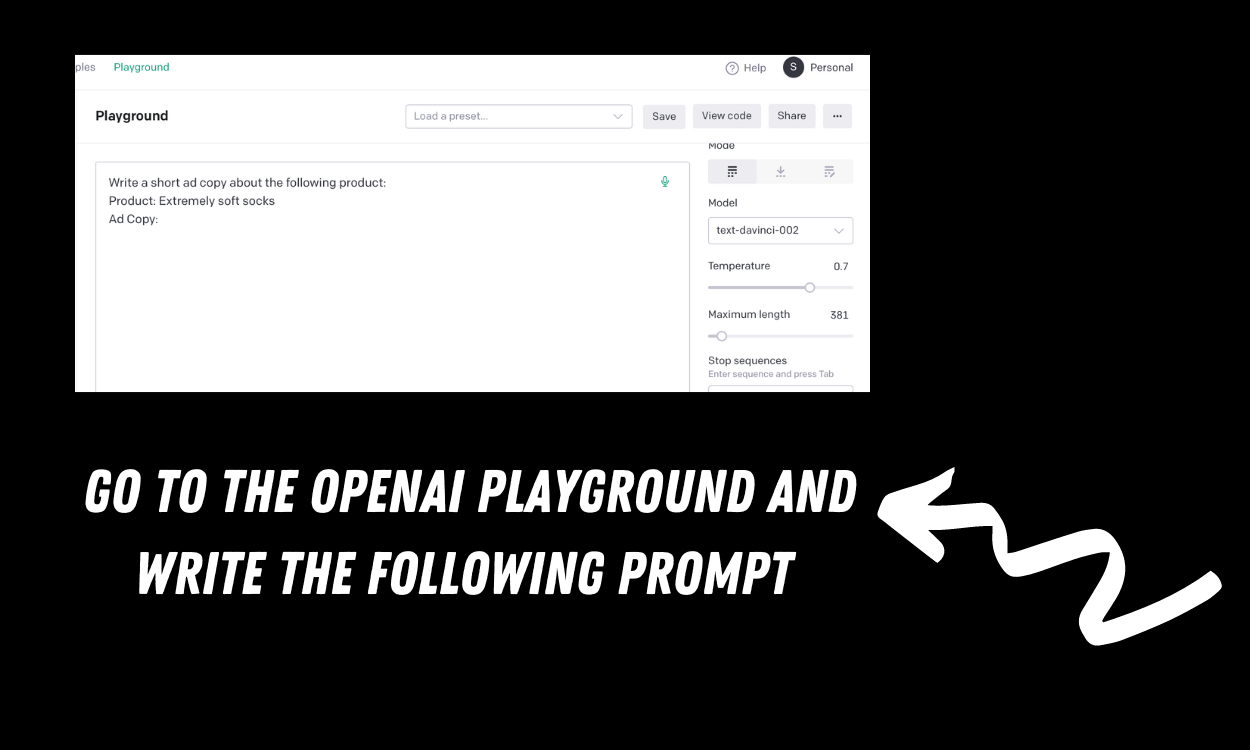
4. Write your prompt
Now, go back to OpenAI and write your prompt. Make sure the model in the upper right corner is "text-davinci-002".
A prompt is kind of like a question we want the AI to answer for us. **If you run the prompt to see what the AI responds with, make sure to delete the AI response before the next step!**
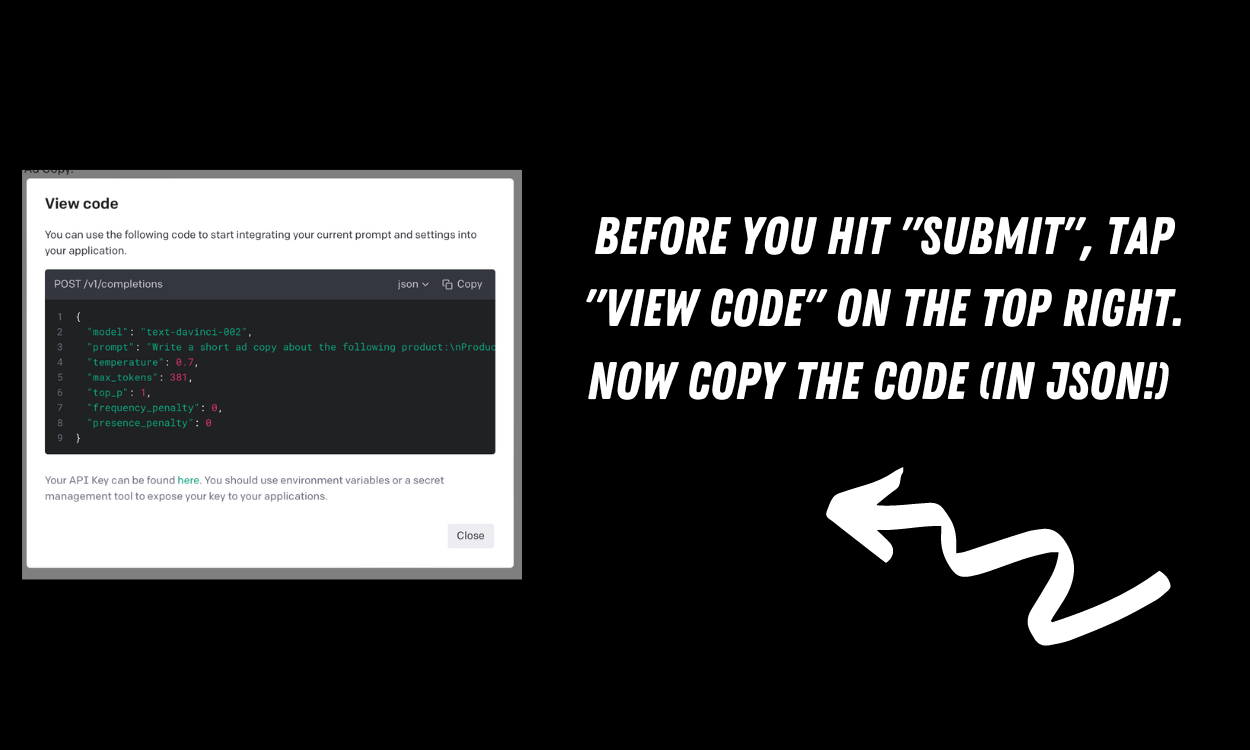
5. Copy code
Now tap “view code”, and then use the toggle on the top right to view code in JSON.
Then copy it!You’re very close to creating your own AI Bot! 🤖
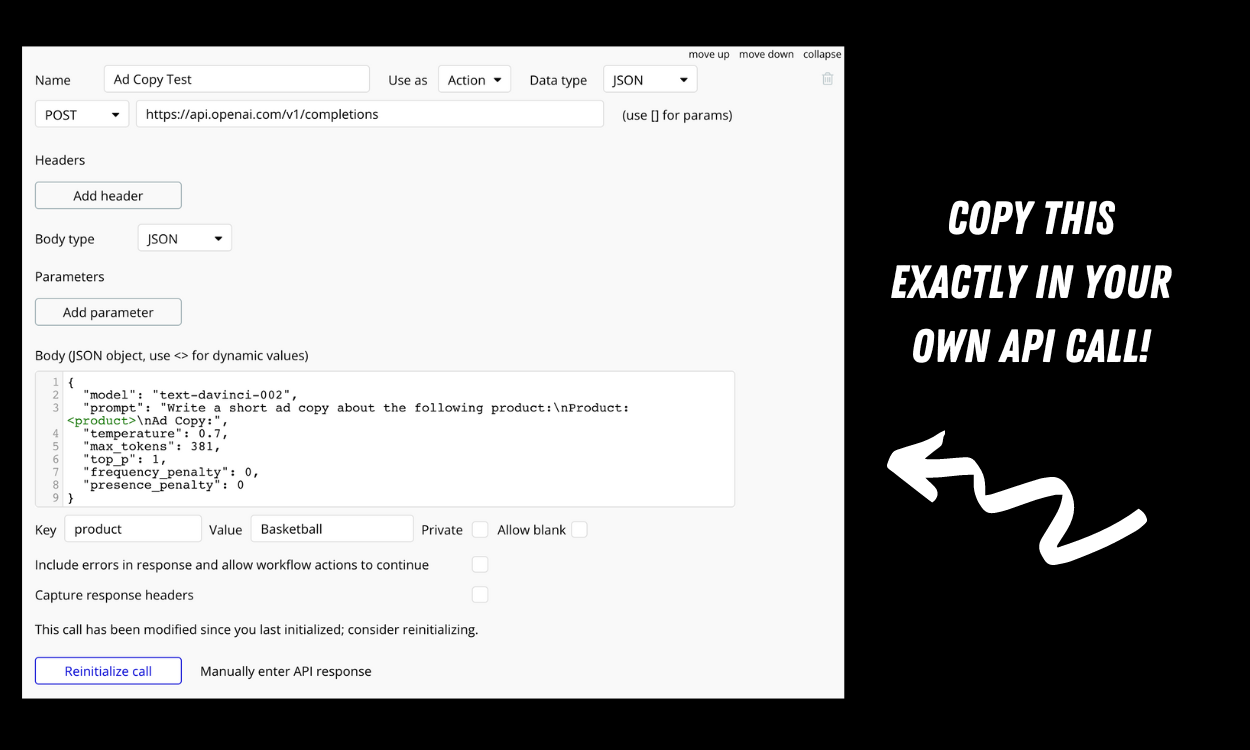
6. Create API call
Now back to Bubble! Add a new call to your OpenAI API in the API connector, make the call a "POST", and then copy your code in the body.
In the Body JSON, replace the product text with <product>, and copy everything else from the image exactly!Then hit "initialize call”🚀
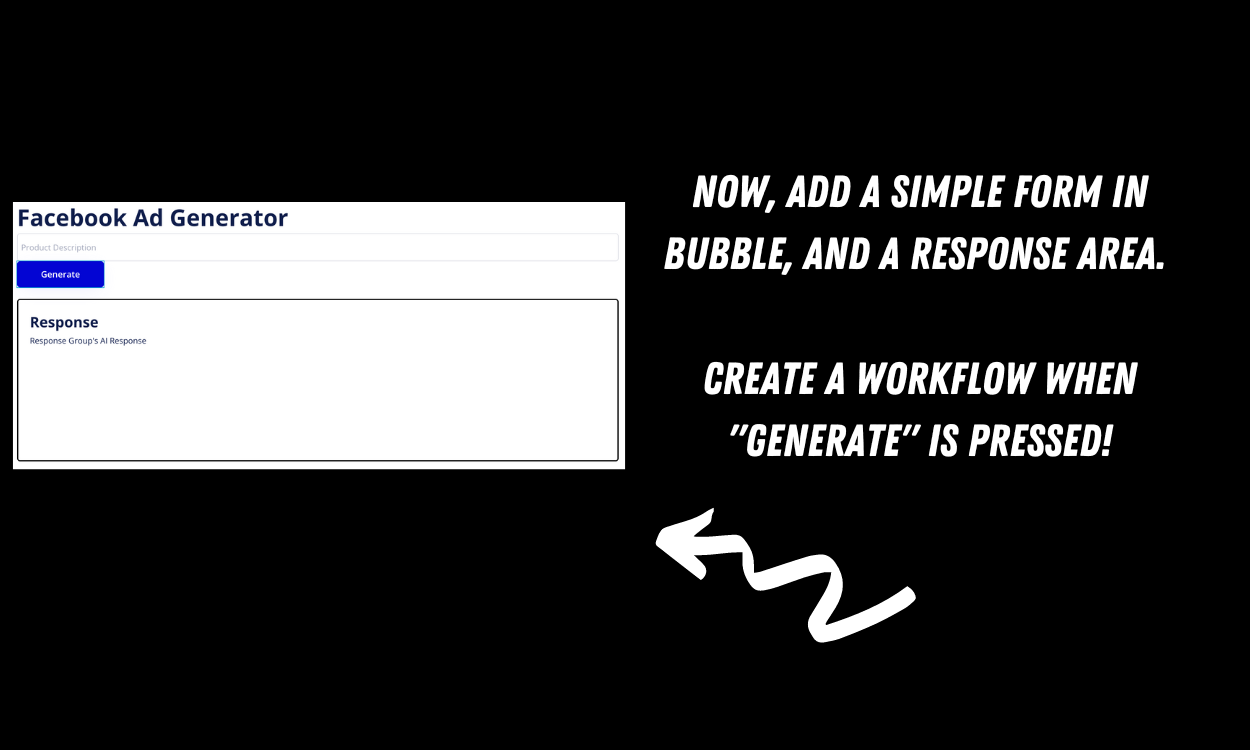
7. Set up input form
Next, go back to Bubble, create a simple form with one input and a button, and group element with a text element inside for the response text.
This is what users will use to interact with our app🖌️
8. Run API call
Now we’ll create our workflow to communicate with OpenAI through our API call!
The workflow action is the "OpenAI - Ad Copy Test" call we created earlier. The form’s value is passed through to our API call. (If you don’t see the input, check your settings in step 6!)

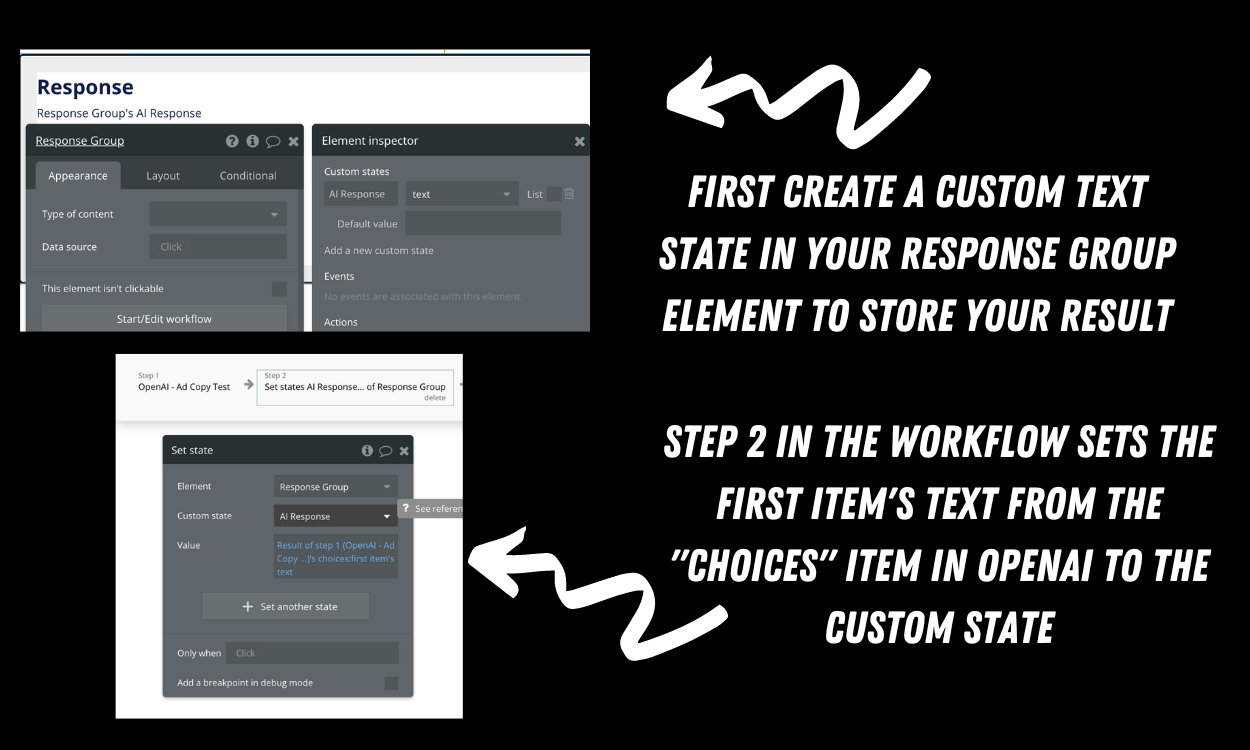
9. Store responses
Almost there!! Now we need to store our response in our app.
Create a custom text state in your response group element to store your result on the page. Then, back in your workflow, set the API call response to that custom state so we can see the result on the page!
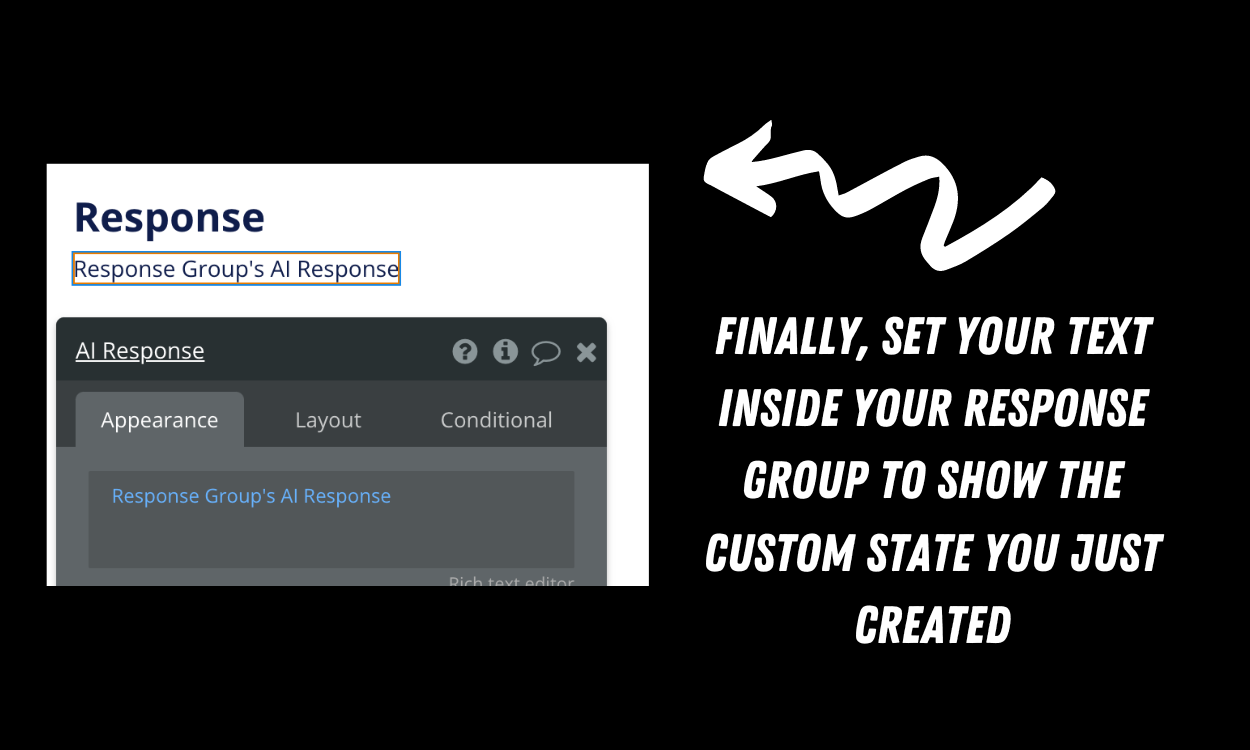
10. Show image!
Last step! Set your text inside your response group to show the custom state you just created.
Create a text field, and then dynamically show the custom state.
If you followed these steps, you just created your very own AI writing app using GPT-3! 🏆
If you liked this, check out our full AI course here! It covers how to build this app in much more detail (even if you’re completely new to Bubble)- how to build content moderation feature into your app - important for public apps!- how to build an image generation app with DALLE-2 and Stable Diffusion.
Frequently Asked Questions
Do I need coding experience to work with a GPT-3 writer app in Bubble?
No. The guide is written for no-code and AI-assisted builders. You may run into concepts like APIs, prompts, databases, or workflows, but the goal is to make the process usable without traditional software development.
What is the first step for a GPT-3 writer app in Bubble?
Start by defining the exact outcome you want, then choose the simplest tool or workflow that can produce it. The article covers related steps like Create a no-code GPT3 writer app with Bubble and OpenAI 🤖✍️, Create an OpenAI account, and Create an API Key.
How long does it take to build a GPT-3 writer app in Bubble?
A simple prototype can often be built quickly, but a production-ready version takes longer because you need to test the data, design, permissions, automations, and edge cases.
What mistakes should I avoid when building a GPT-3 writer app in Bubble?
Avoid starting with too many features, skipping validation, or choosing a tool before you understand the workflow. Build the smallest useful version first, then improve it based on real feedback.
Advertiser disclosure: some links on this website are affiliate links, meaning No Code MBA may make a commission if you click through and purchase.