
No-code app development is revolutionizing the way people build and launch mobile and web applications.
With powerful platforms like Glide, anyone can create functional and visually appealing apps without writing a single line of code.
In this Glide app tutorial, we'll walk you through the process of building a user-specific to-do list app step-by-step.
Getting Started with Glide
- Create a Glide account at glideapps.com
- Familiarize yourself with the Glide interface
- Create a new project in Glide
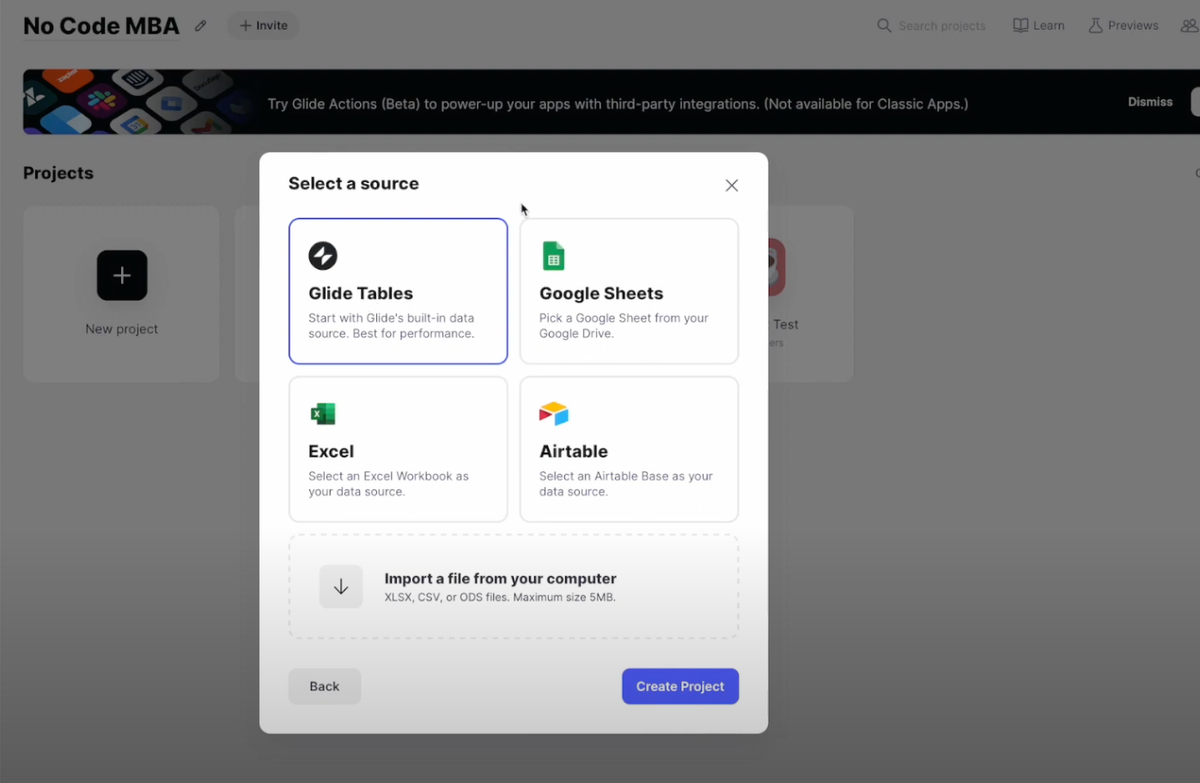
- Choose Glide Tables as your data source for optimal performance
Building a To-Do List App in Glide
Step 1: Set up the data structure for user-specific data
Next, select your source. Glide allows you to connect to various data sources. In our case, we'll use Glide Tables, the built-in data source that is said to be best for performance.
You can also connect Glide to Google Sheets, Excel, or Airtable if you prefer.
- Create a "tasks" table with columns for task name, completion status, and user ID
- Add a unique row ID column to the "users" table to connect tasks to individual users
Step 2: Design the app layout
- Add a checklist component to display tasks
- Customize the checklist settings to show only uncompleted tasks
- Create a separate collection for completed tasks
Step 3: Implement user-specific data filtering
- Filter tasks based on the logged-in user's unique row ID
- Display only the tasks specific to the current user
Enhancing Your Glide App Design
- Customize the app's appearance with color schemes and themes
- Adjust component sizes and layouts for optimal user experience
- Enable task addition and completion for seamless interactivity
- Implement user-friendly navigation between screens
Publishing and Managing Your Glide App
Configure privacy settings
- Choose between public and private app access
- Set up user access controls to manage who can use your app
Publish your app
- Generate a shareable app link for easy access
- Test your app on various devices to ensure compatibility
Manage users
- Add and remove users as needed
- Handle user access requests efficiently
By following this Glide app tutorial, you'll gain a solid understanding of how to build a user-specific to-do list app without writing code. As you become more familiar with Glide's features and capabilities, you can explore more advanced app templates and customize them to suit your unique needs.
Ready to take your no-code skills to the next level? Sign up for No Code MBA and access our comprehensive courses on Glide and other powerful no-code tools. We'll help you unlock your app development potential and build stunning applications in record time.
Frequently Asked Questions
Do I need any coding experience to build apps with Glide?
No, you don't need any coding experience to build apps with Glide. The platform is designed for non-technical users, allowing you to create functional and visually appealing apps using a visual, drag-and-drop interface.
Can I customize the design of my Glide app?
Yes, Glide offers a range of customization options for your app's design. You can change color schemes, themes, component sizes, and layouts to create a unique look and feel that aligns with your brand or personal preferences.
Is it possible to add more features to my to-do list app?
Absolutely! Glide provides a wide variety of components and features that you can add to your app. You can include features like task due dates, task categories, user profiles, and more to enhance the functionality of your to-do list app.
How can I share my Glide app with others?
Glide makes it easy to share your app with others. Once you publish your app, you'll receive a shareable link that you can send to anyone you want to grant access to. You can also manage user access controls to ensure only authorized individuals can use your app.
Can I monetize my Glide app?
Yes, you can monetize your Glide app in various ways. You can offer premium features through in-app purchases, add advertisements, or create a subscription-based model. Glide provides the tools and flexibility to help you generate revenue from your app creation efforts.
Advertiser disclosure: some links on this website are affiliate links, meaning No Code MBA may make a commission if you click through and purchase.